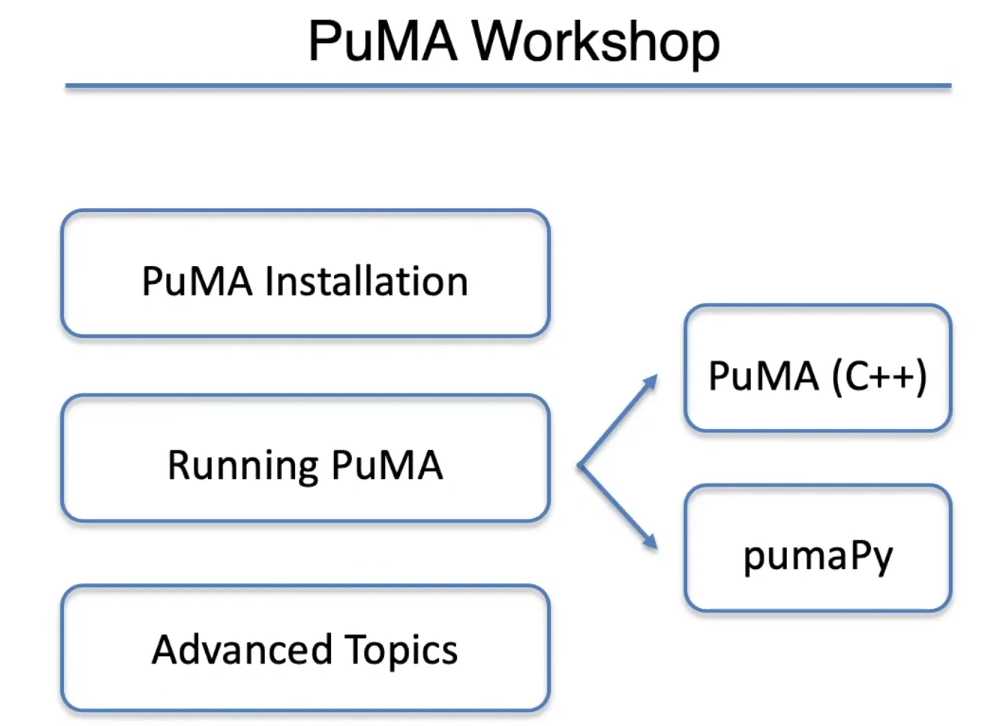
0. Workshop Overview
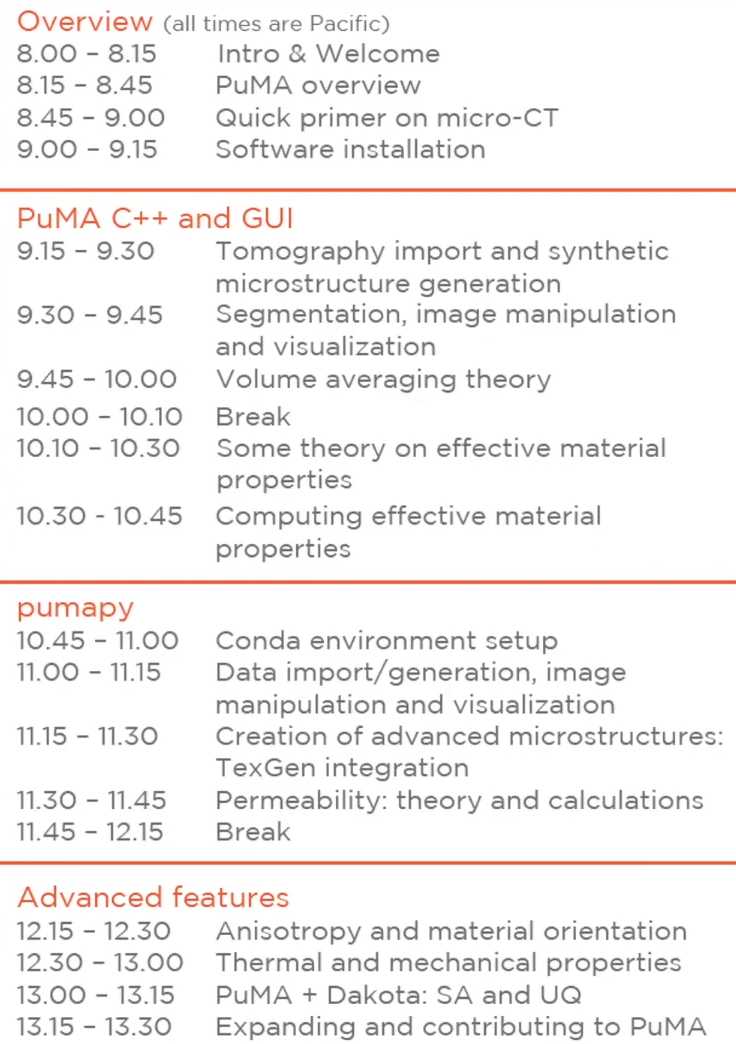
1. Session 1 Introduction and Welcome

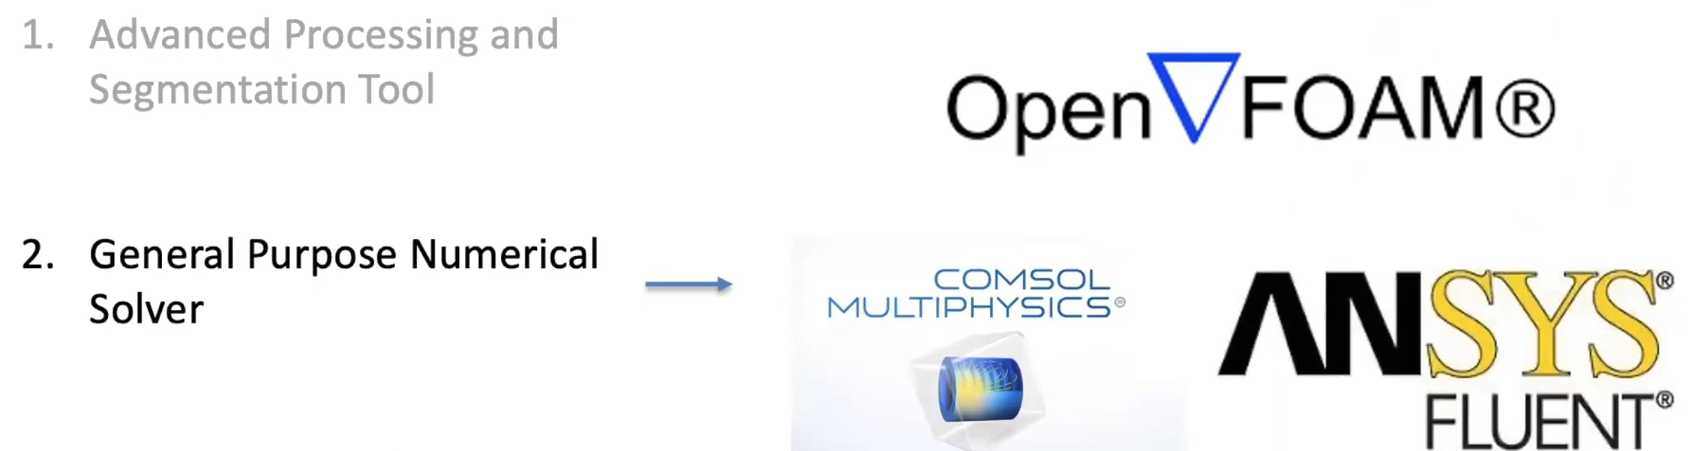
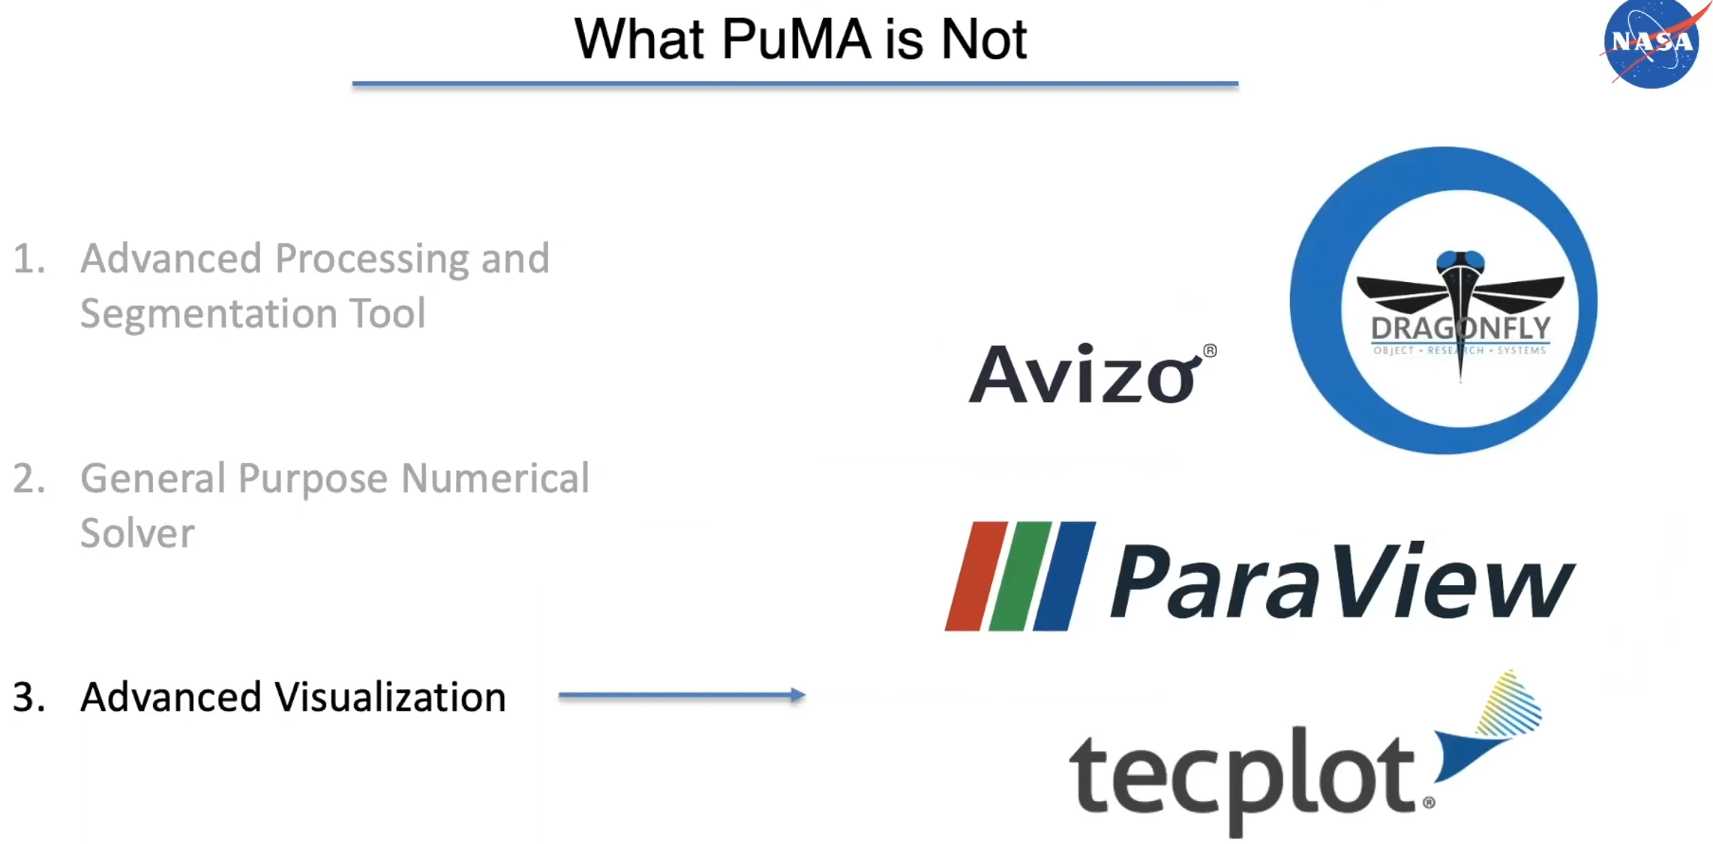
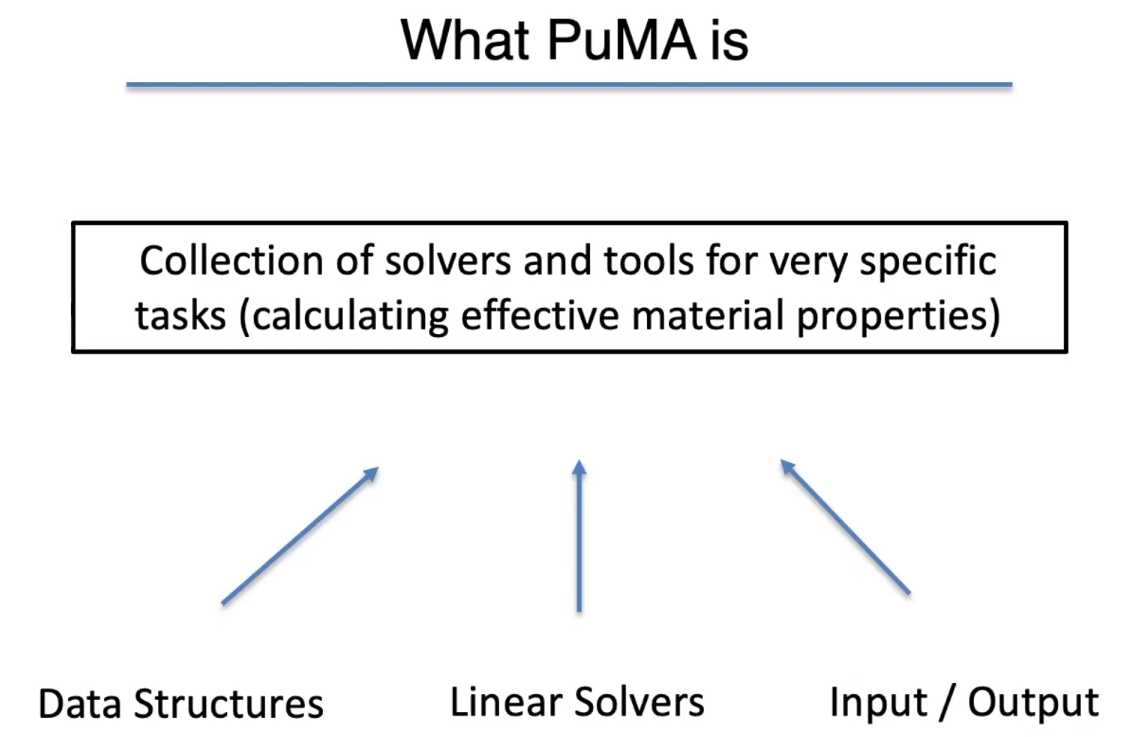
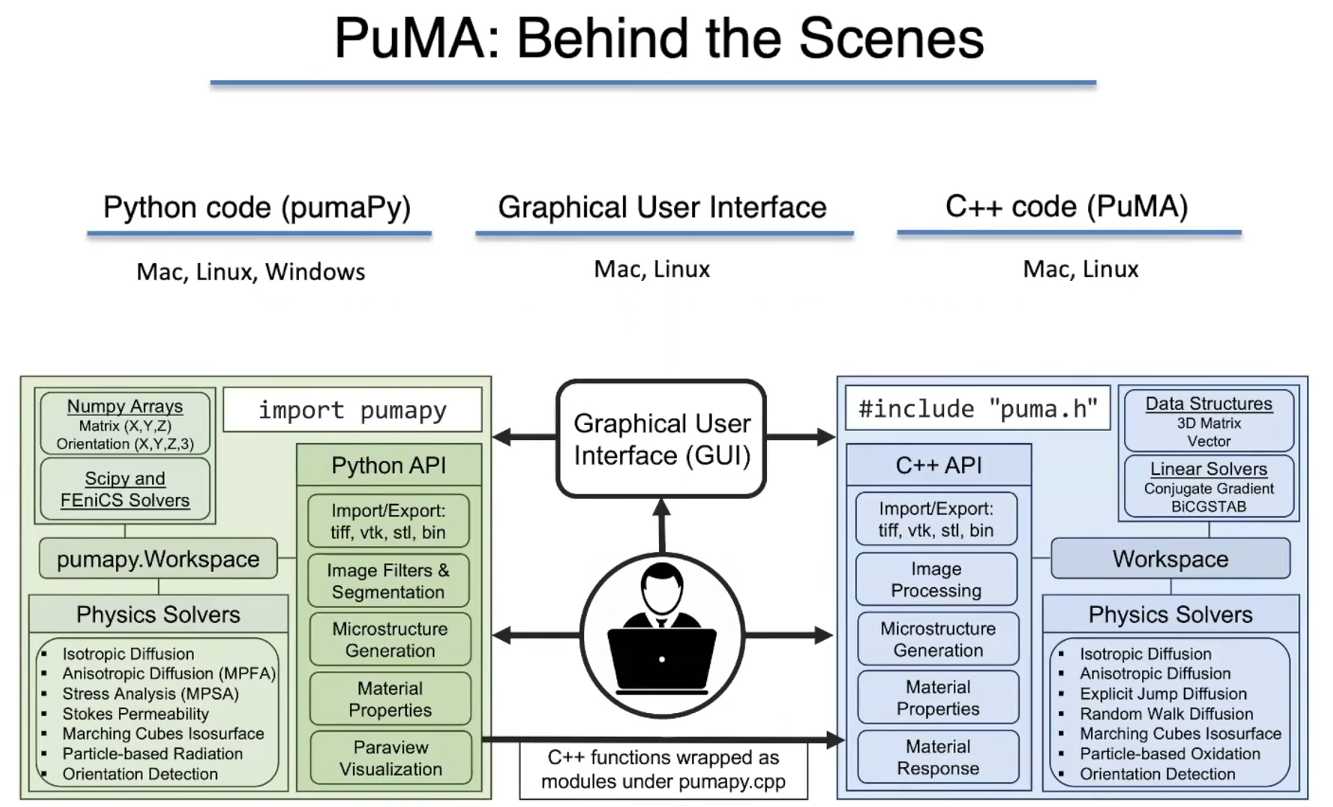
2. Session 2 Introduction to Software
Experimental method:
- 贵
- 耗时
- 微观或多尺度实验难以进行


视频18:50动画
原始视频:
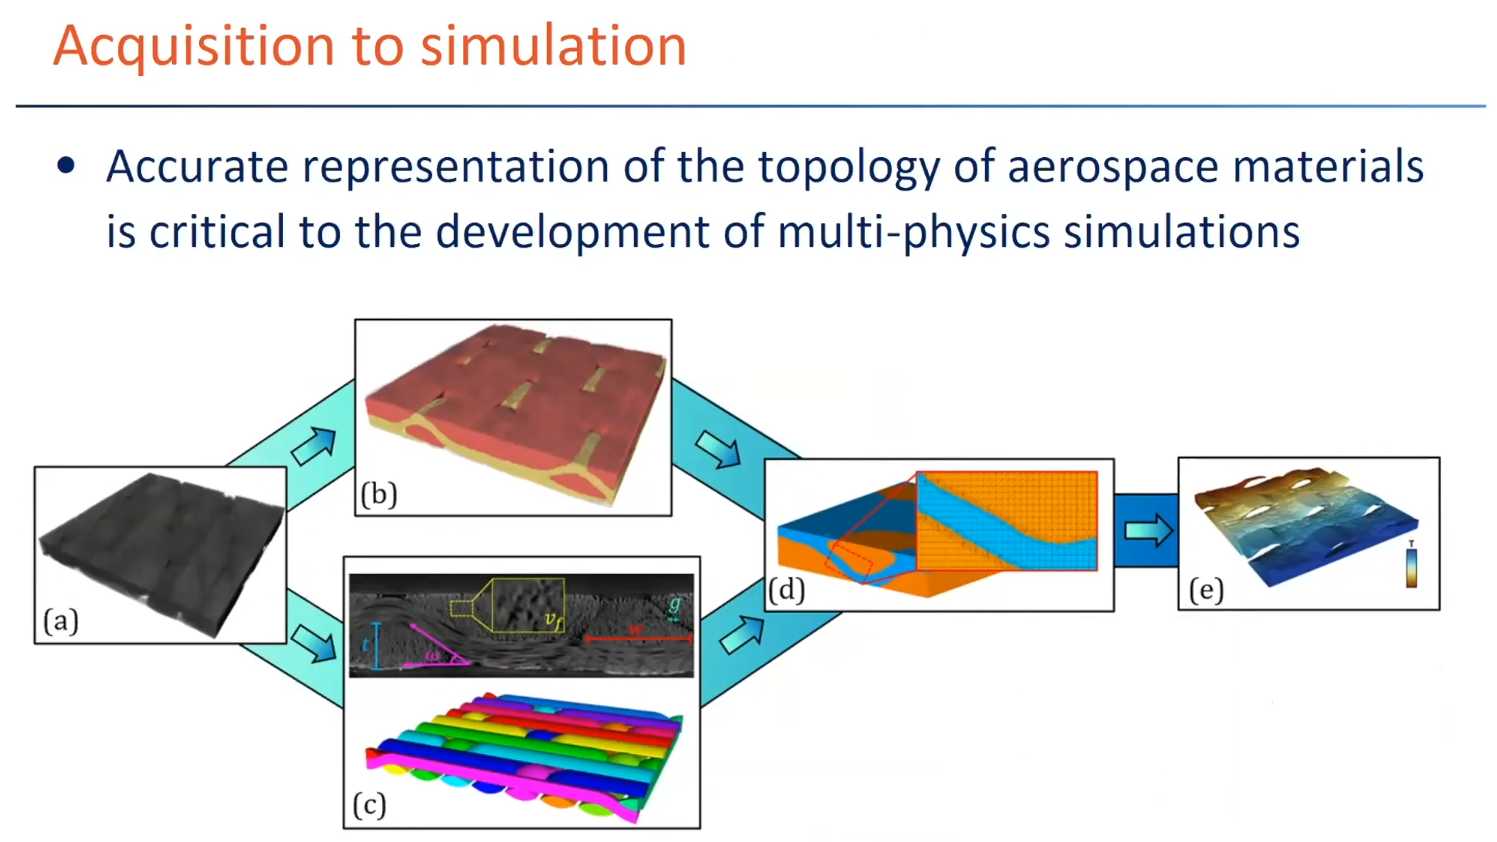
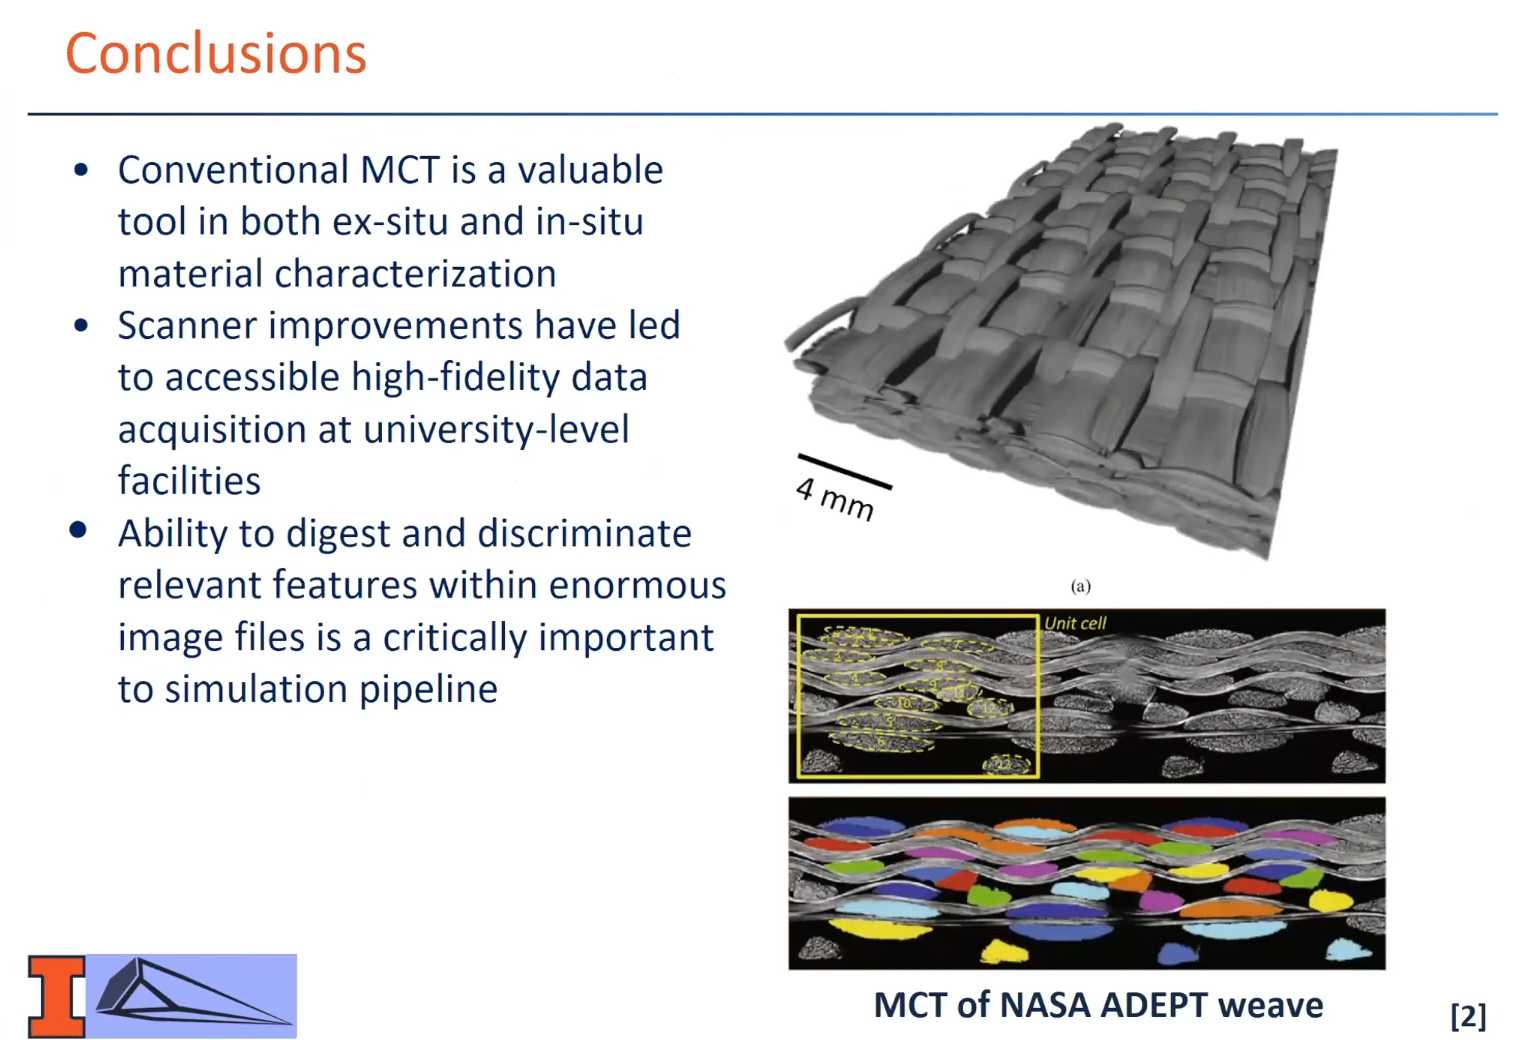
3. Session 3 Introduction to Microtomography
For later watching
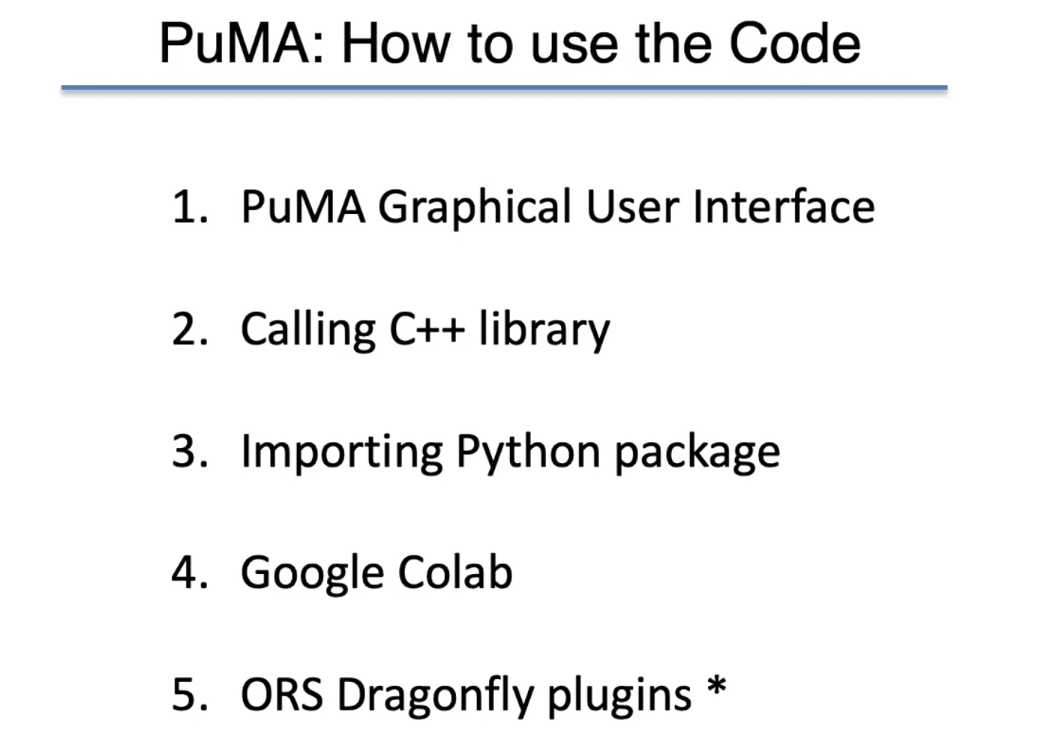
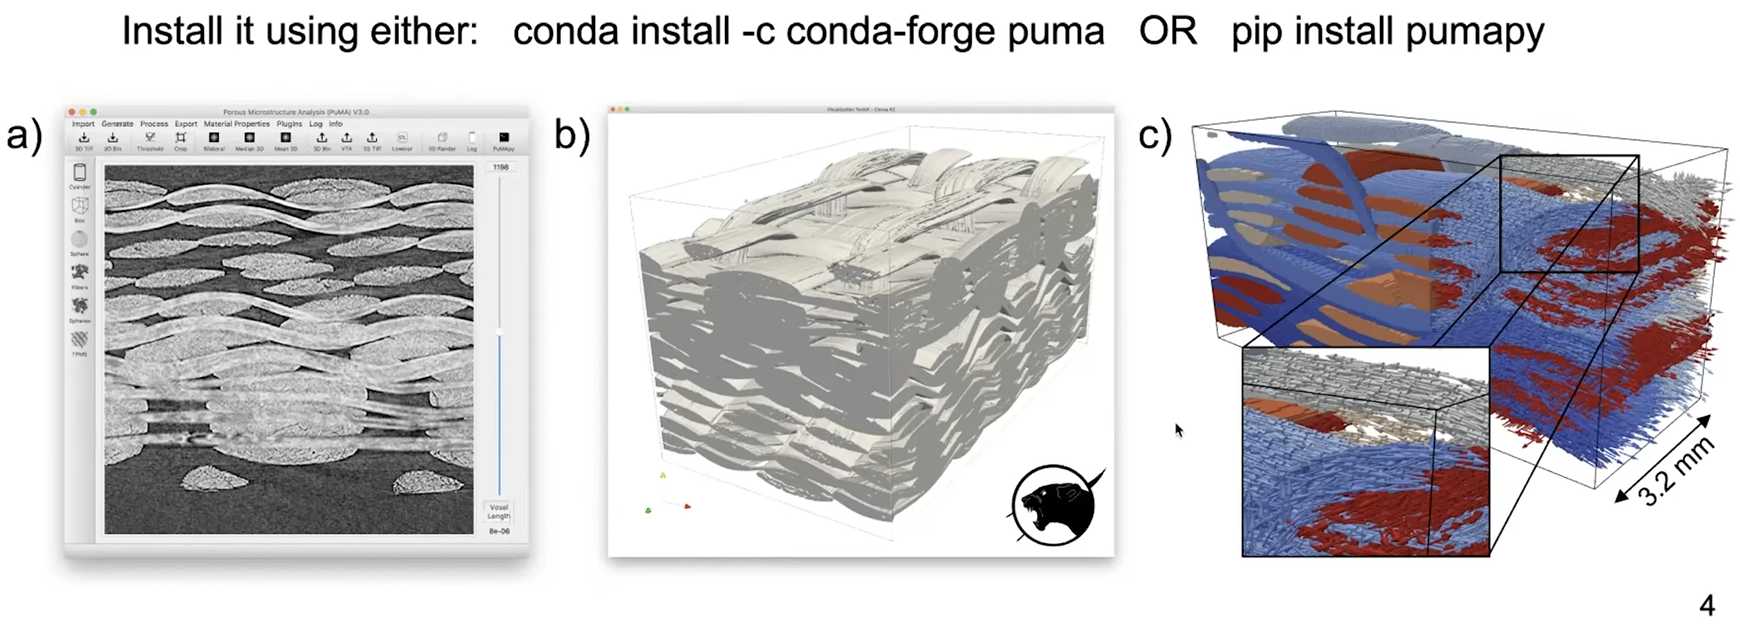
4. Session 4 Software Installation
The best way is to follow the tutorials at GitHub:
- Download and install PuMA: https://github.com/nasa/puma
- Documentation: https://puma-nasa.readthedocs.io
- Community chat: https://gitter.im/puma-nasa/community...
- Online tutorials: https://colab.research.google.com/git...
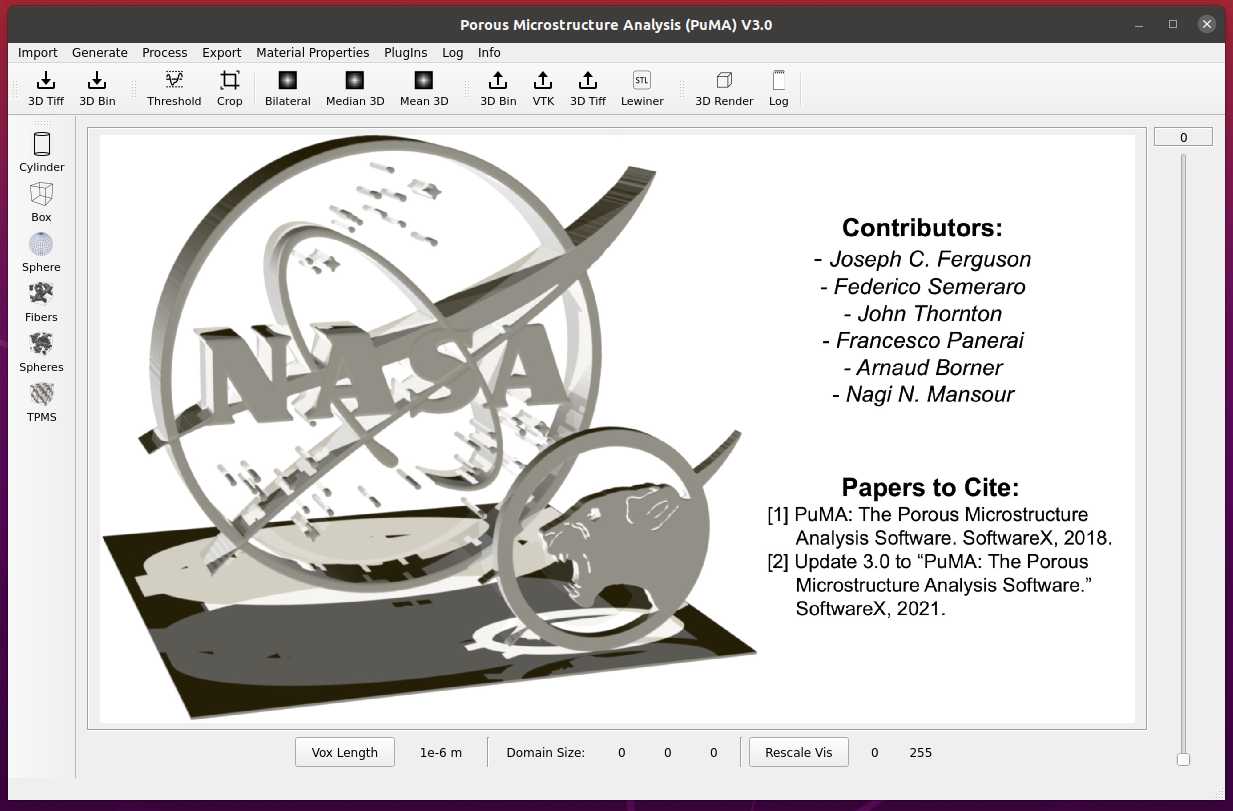
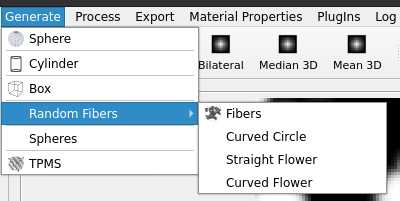
Session 5 PuMA Workshop 2021 - Image Processing in the PuMA GUI

"""shell
pumaGUI
"""
进入GUI界面
- 8 bit tiff 3D image is acceptable for GUI import using
import 3D Tiffor just drag and drop.
默认灰度范围为0-255.分割的图像只有0-1,需要点击Rescale Vis缩放渲染范围。
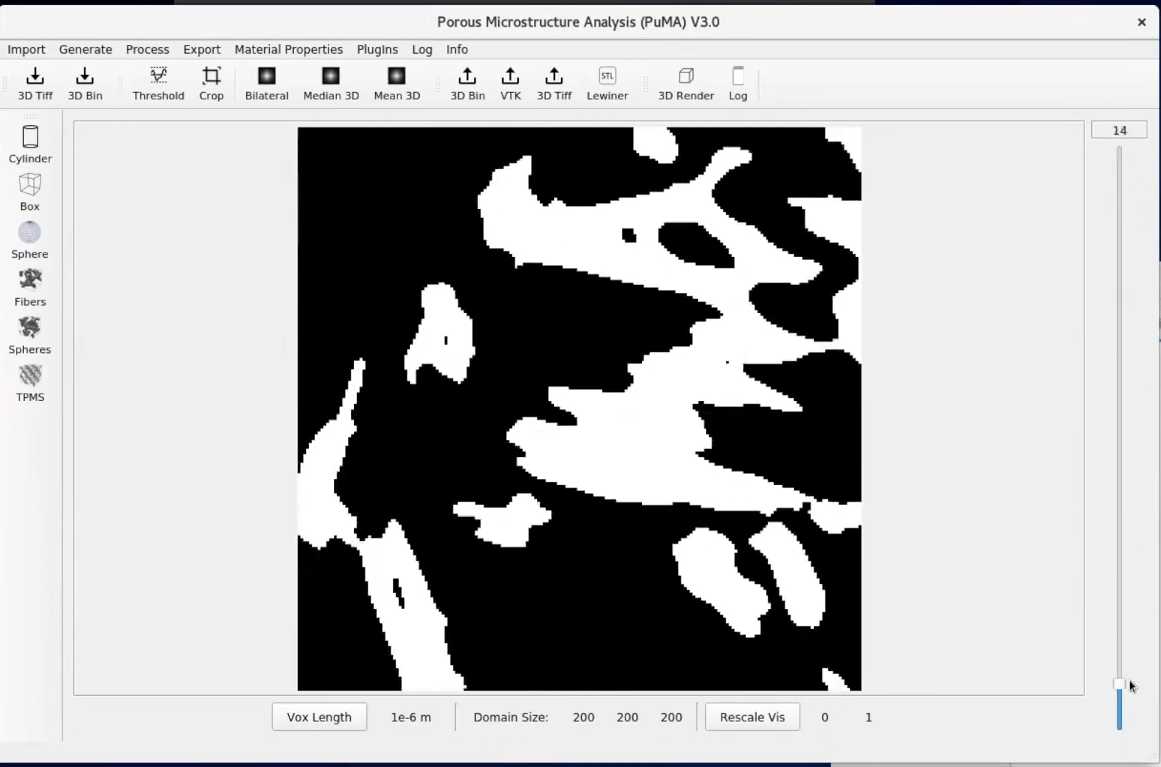
- 支持(双)阈值分割,3D Render用的是PyVista。
- 当前支持生成随机模型(v3)
-
可以将模型导出为watertight的stl模型
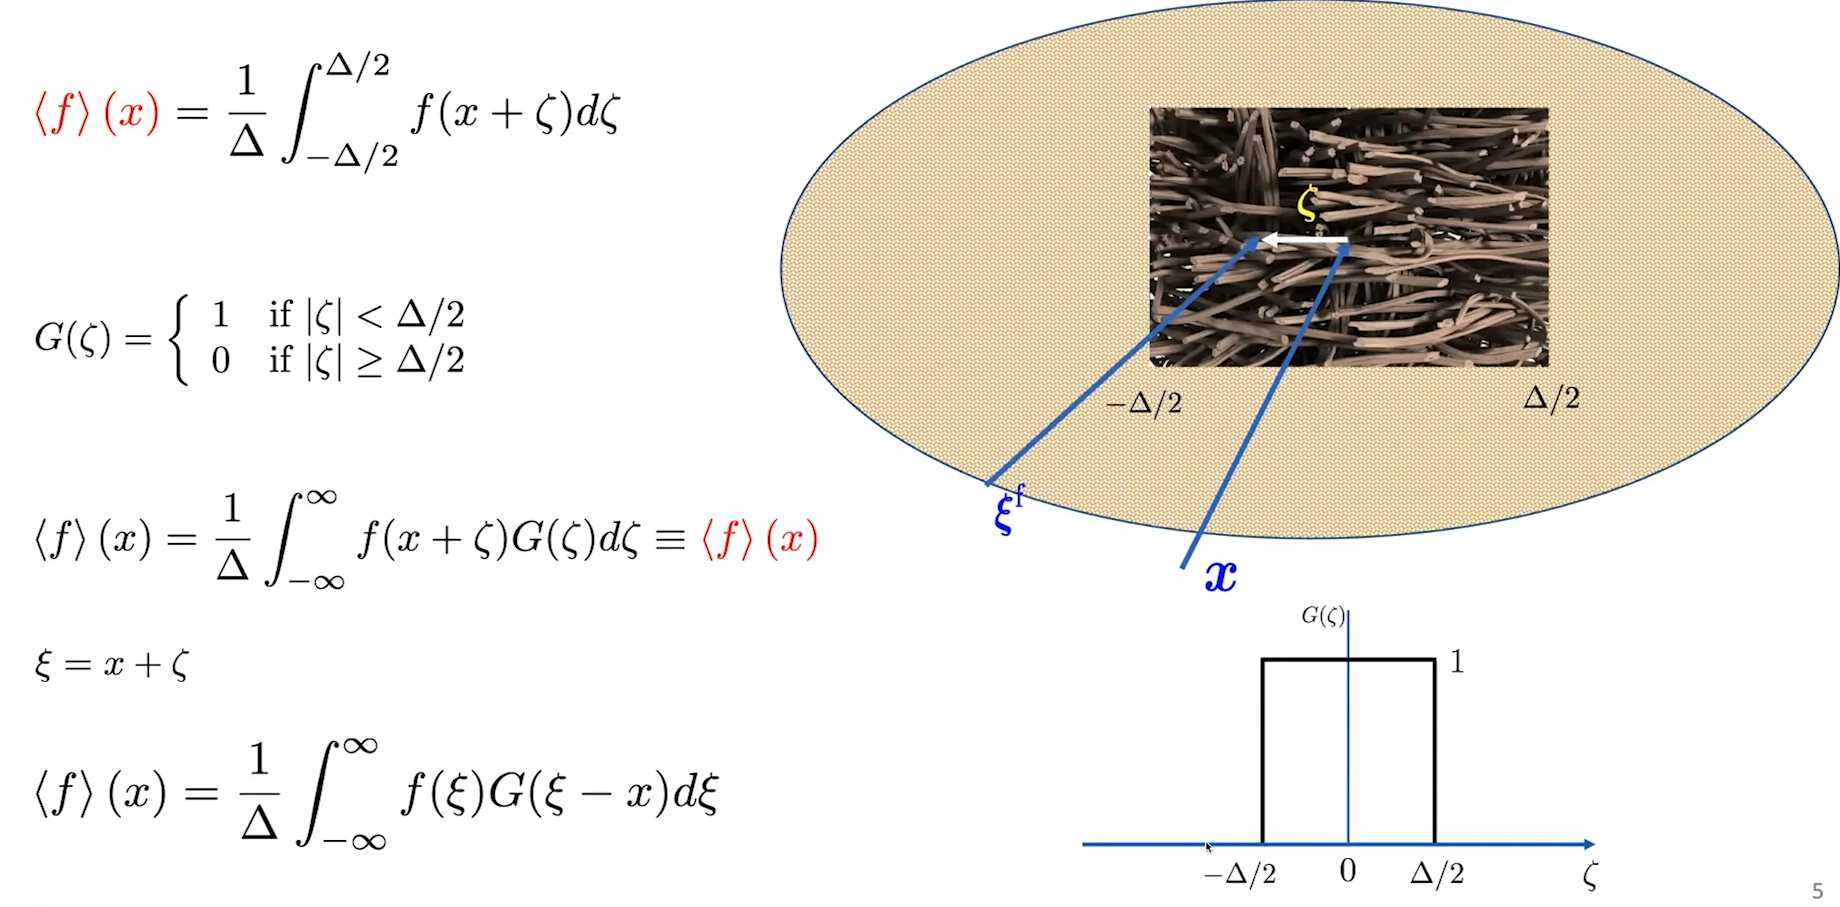
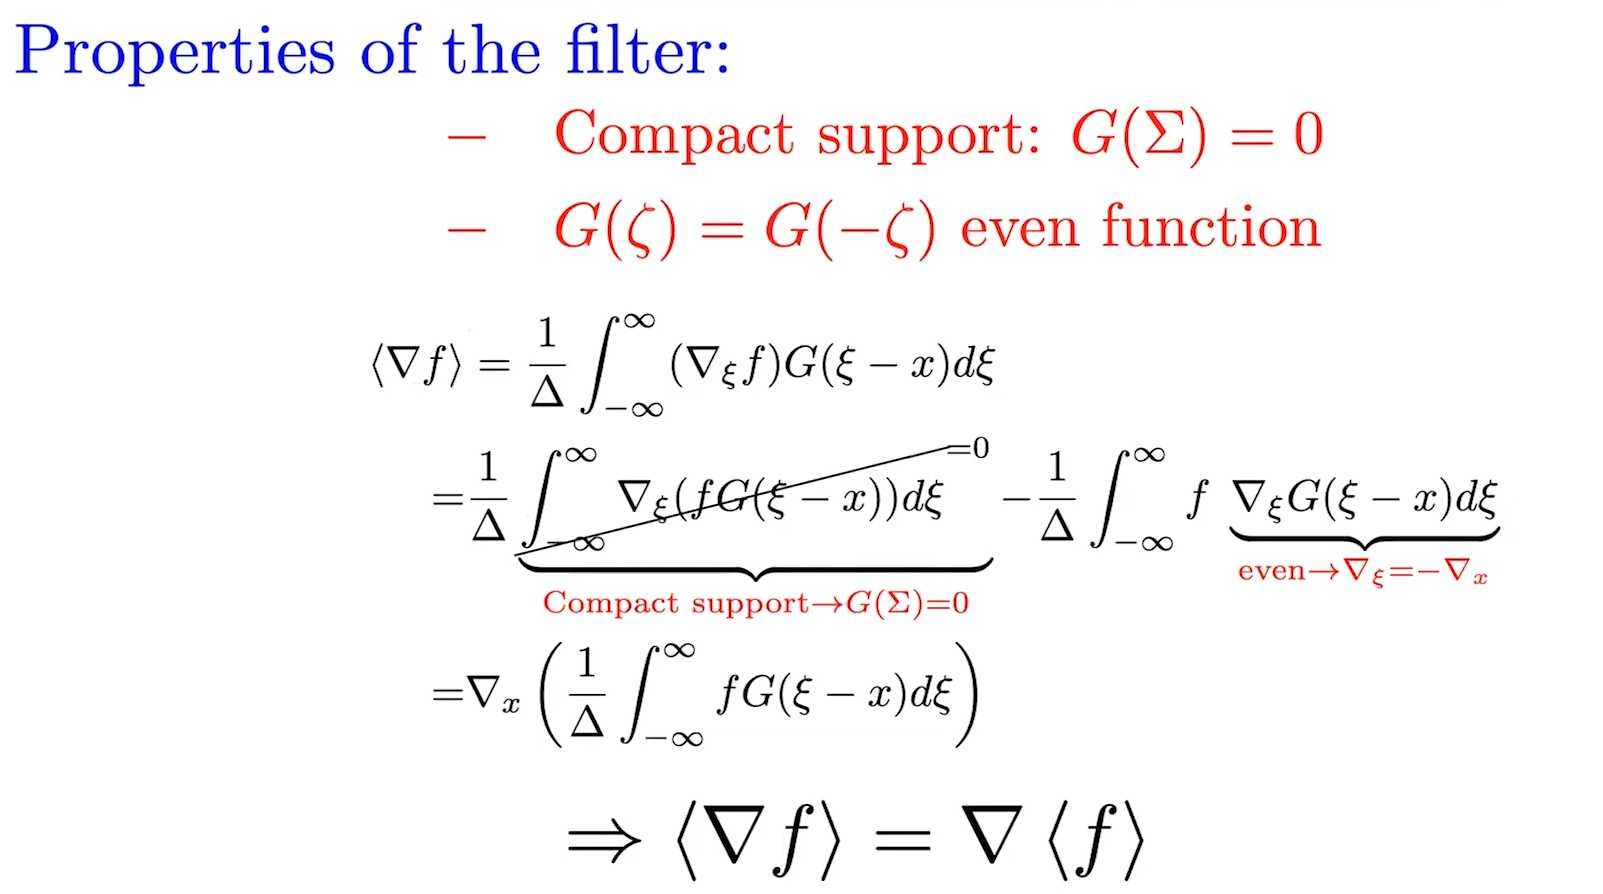
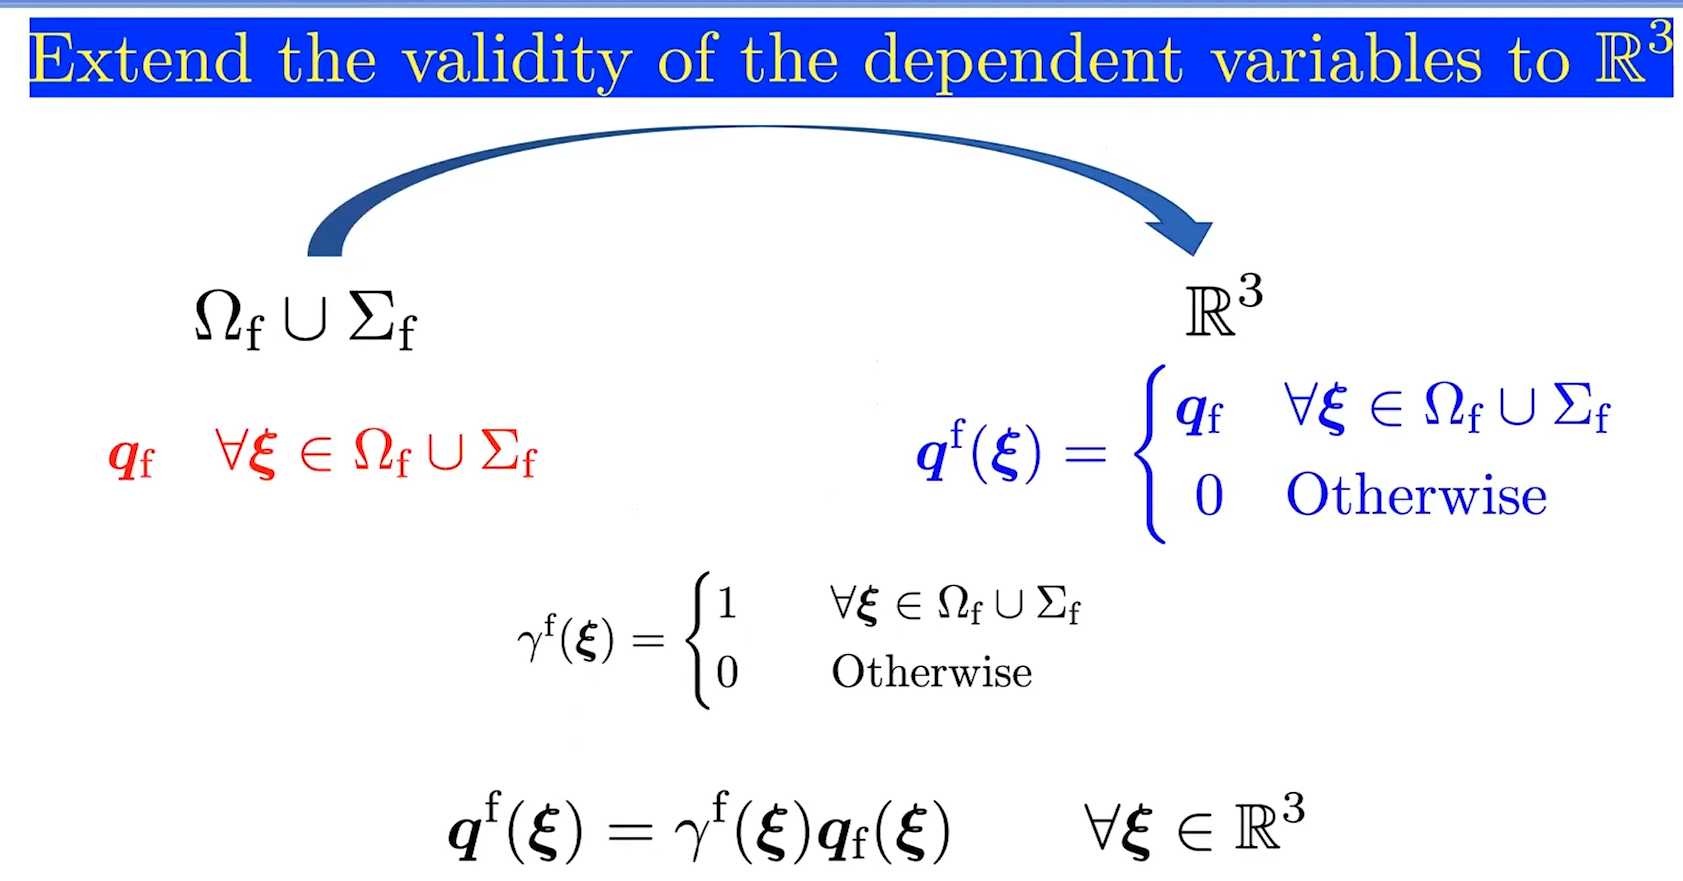
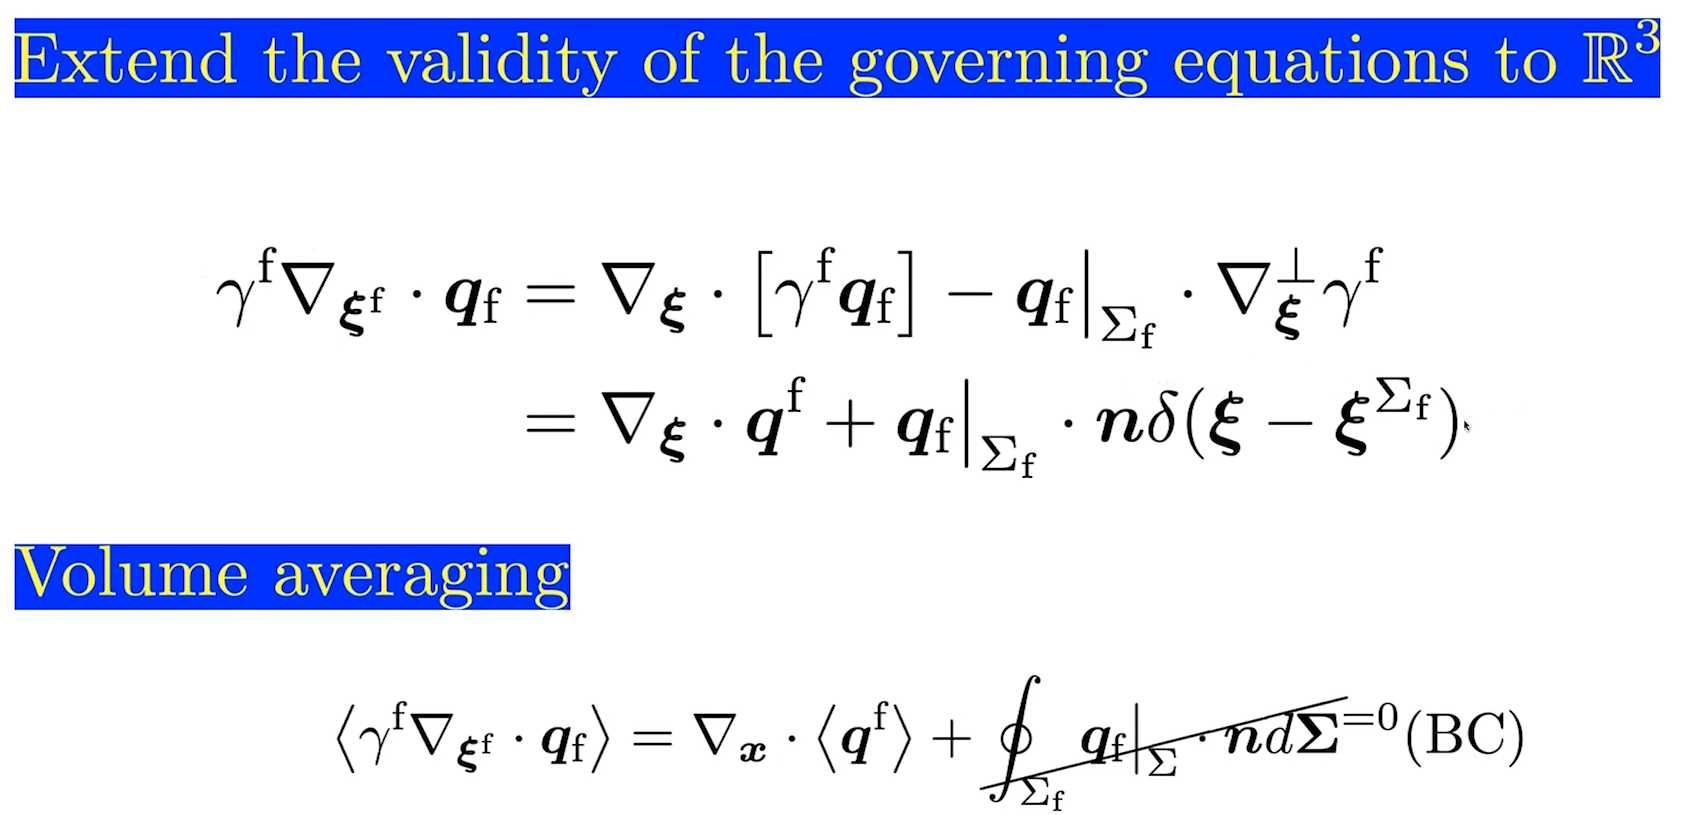
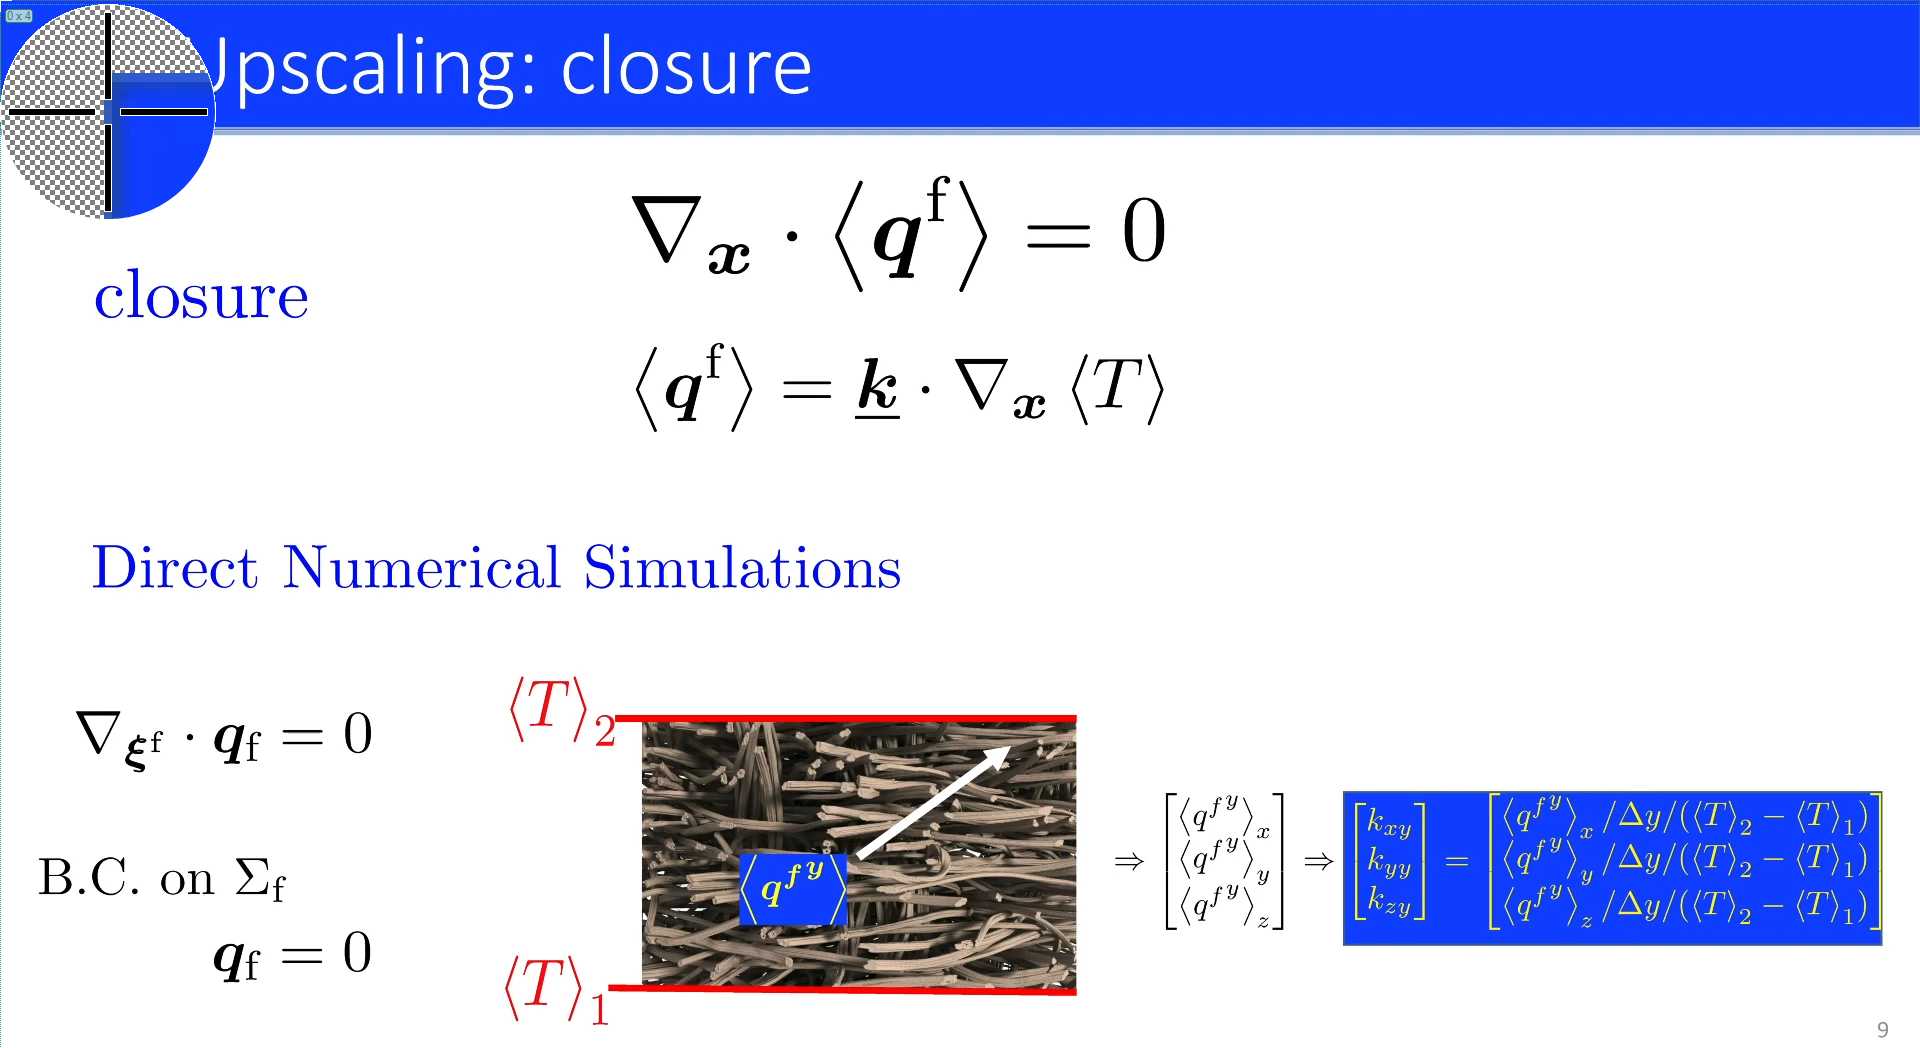
Session 6 PuMA Workshop 2021 - Volume Averaging
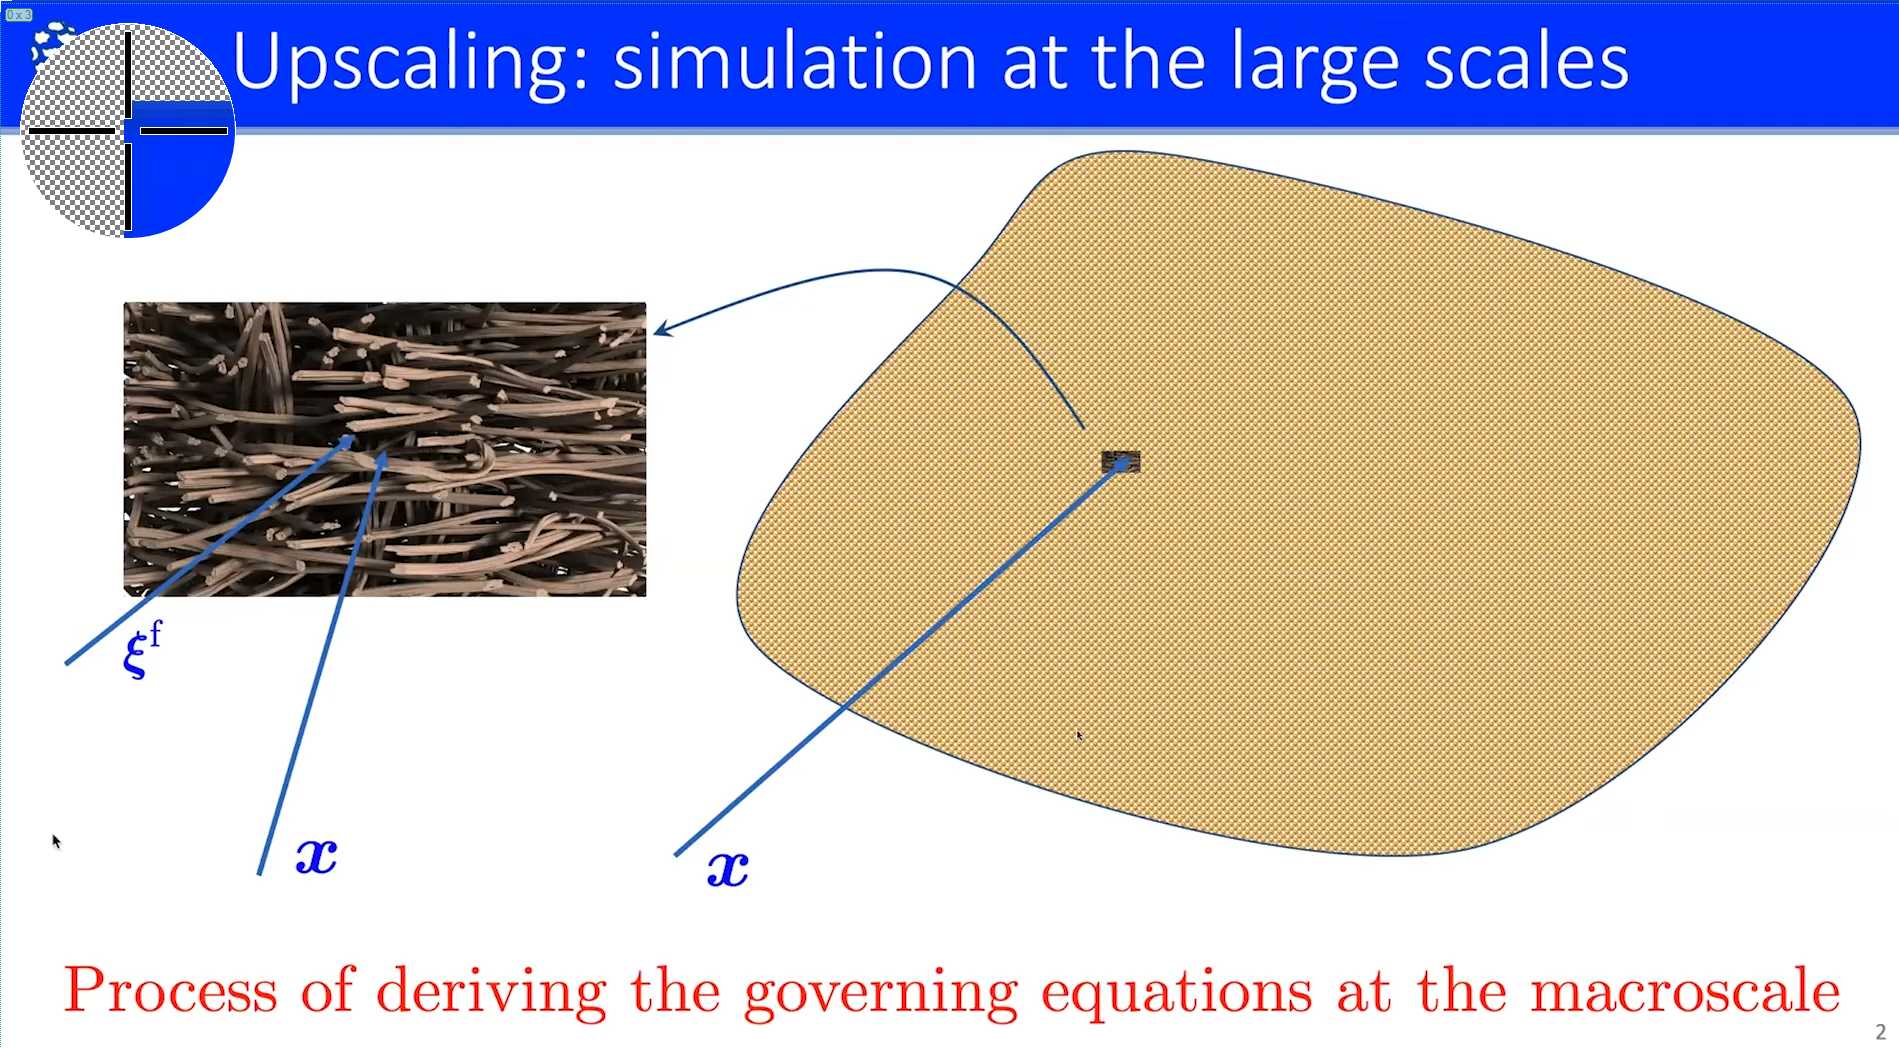

$\Omega_f$: fiber domain; $\Sigma_f$
Divergence of heat flux is zero with
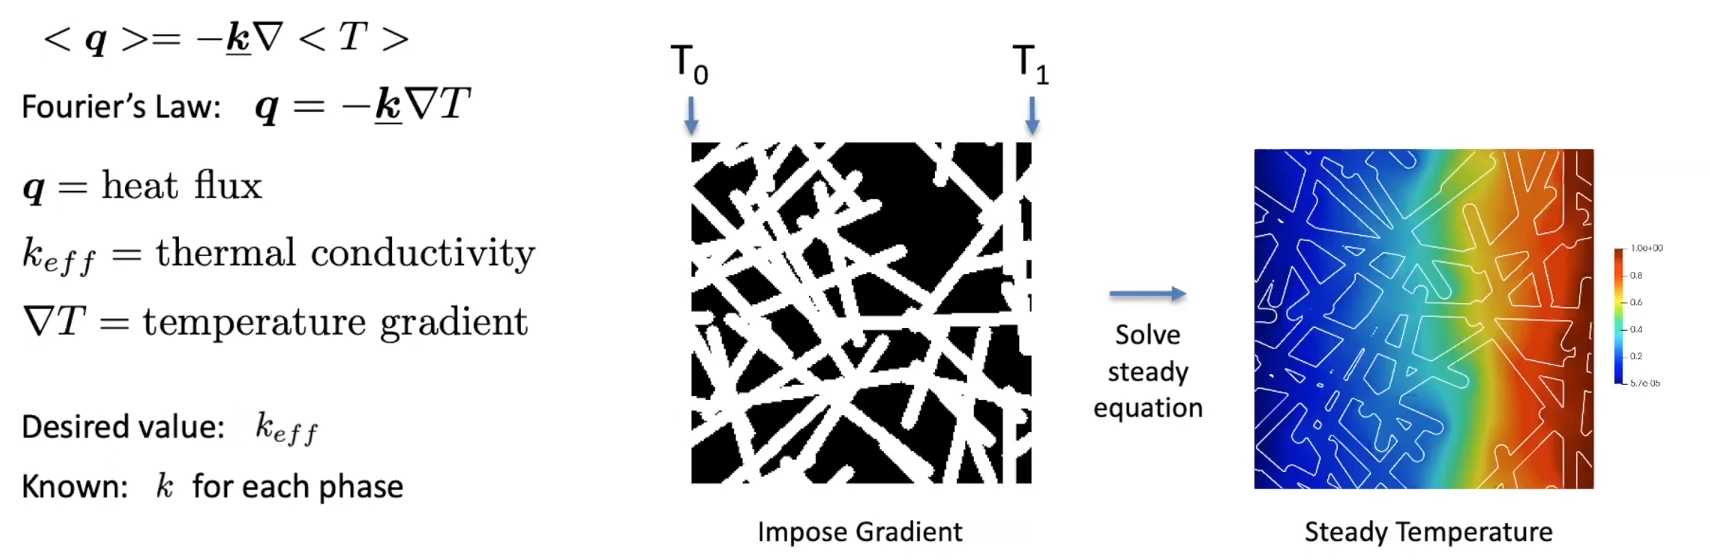
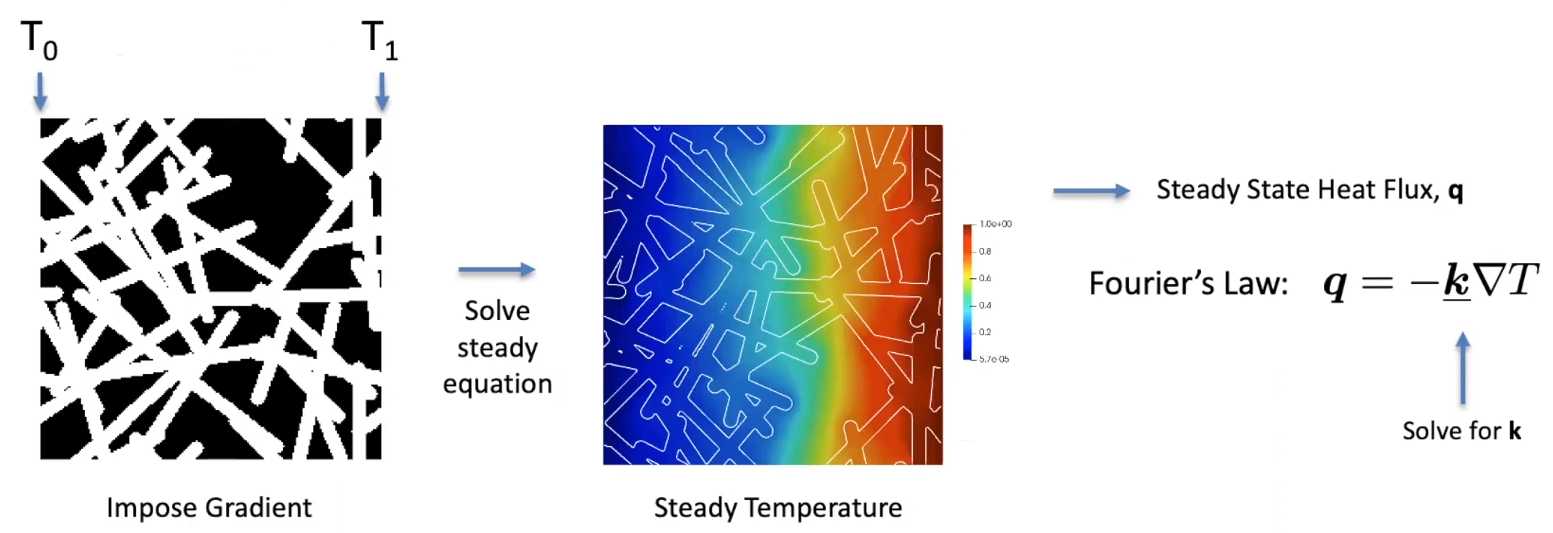
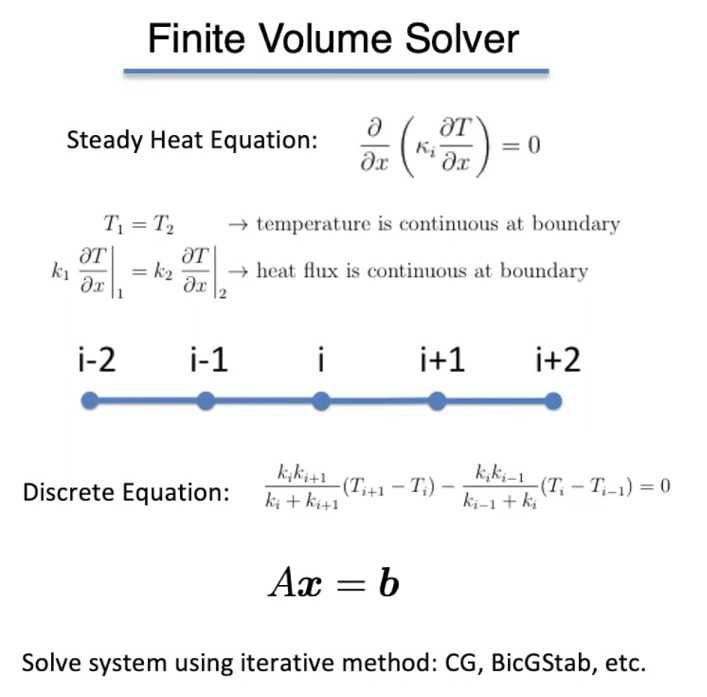
Session 7 PuMA Workshop 2021 - Effective Material Properties in PuMA GUI
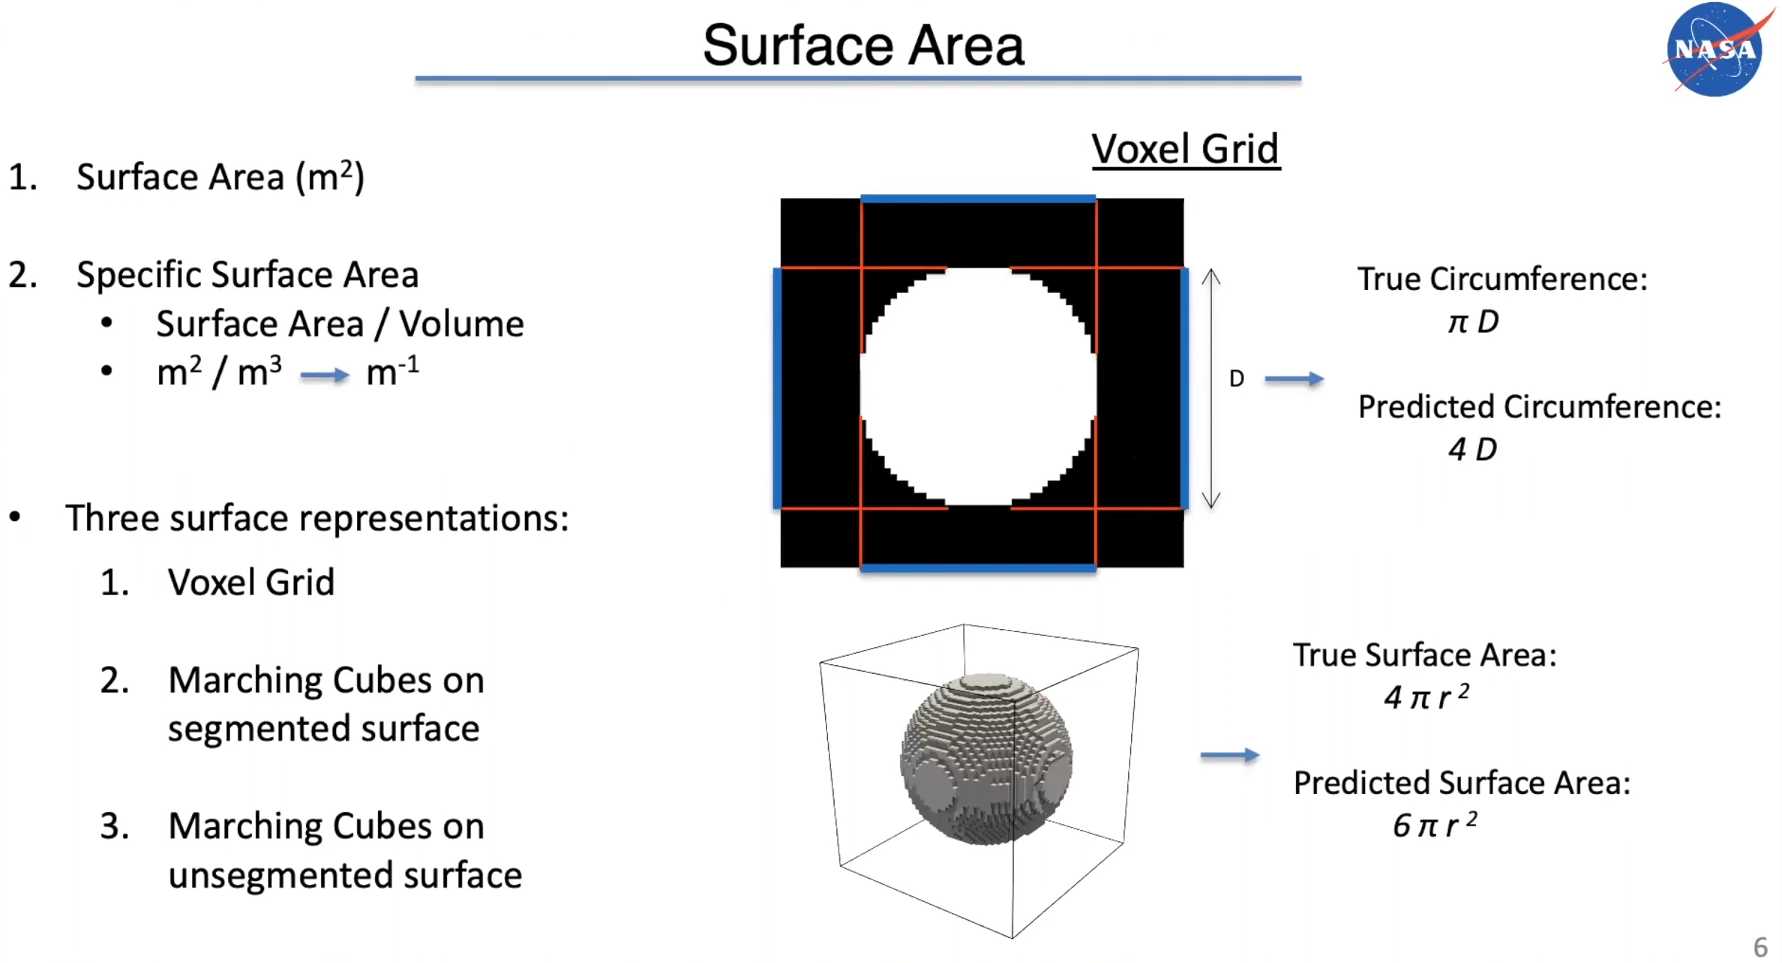
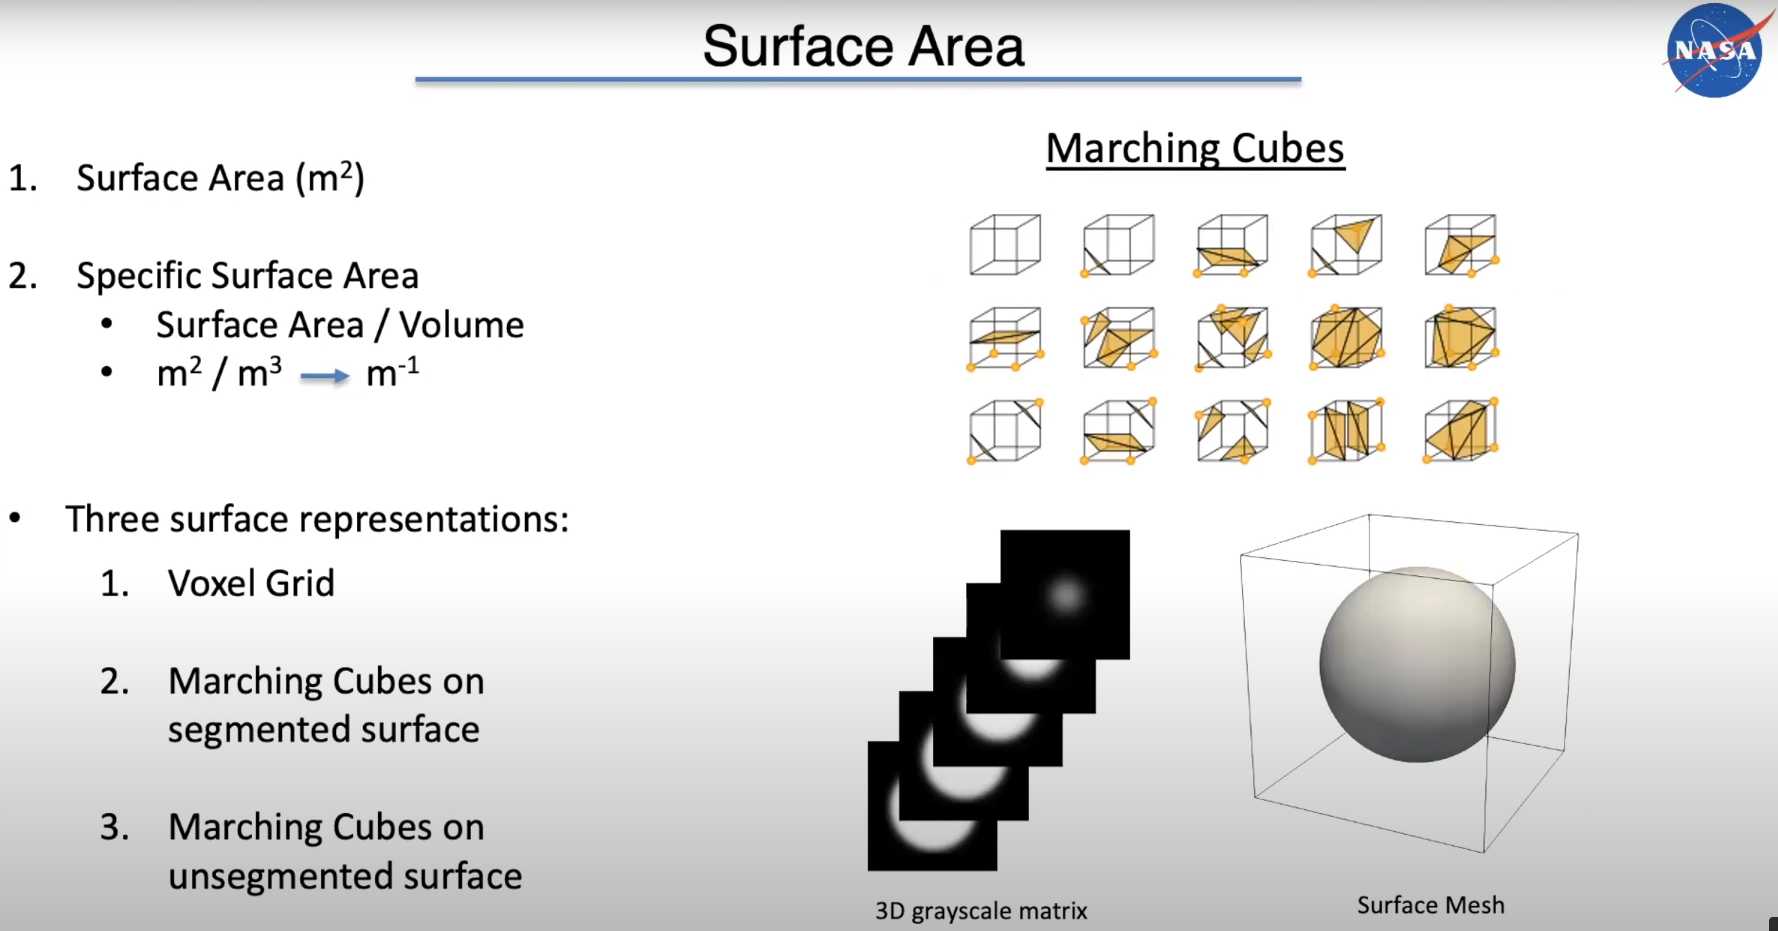
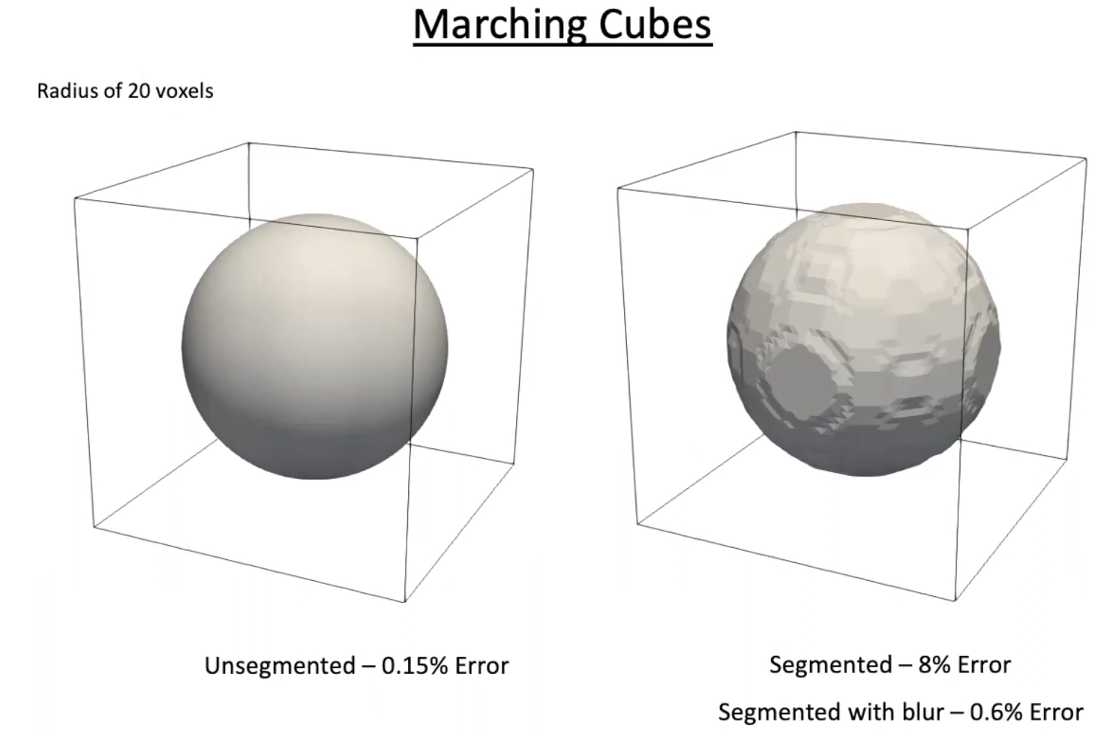
Surface area
Effective Thermal Conductivity

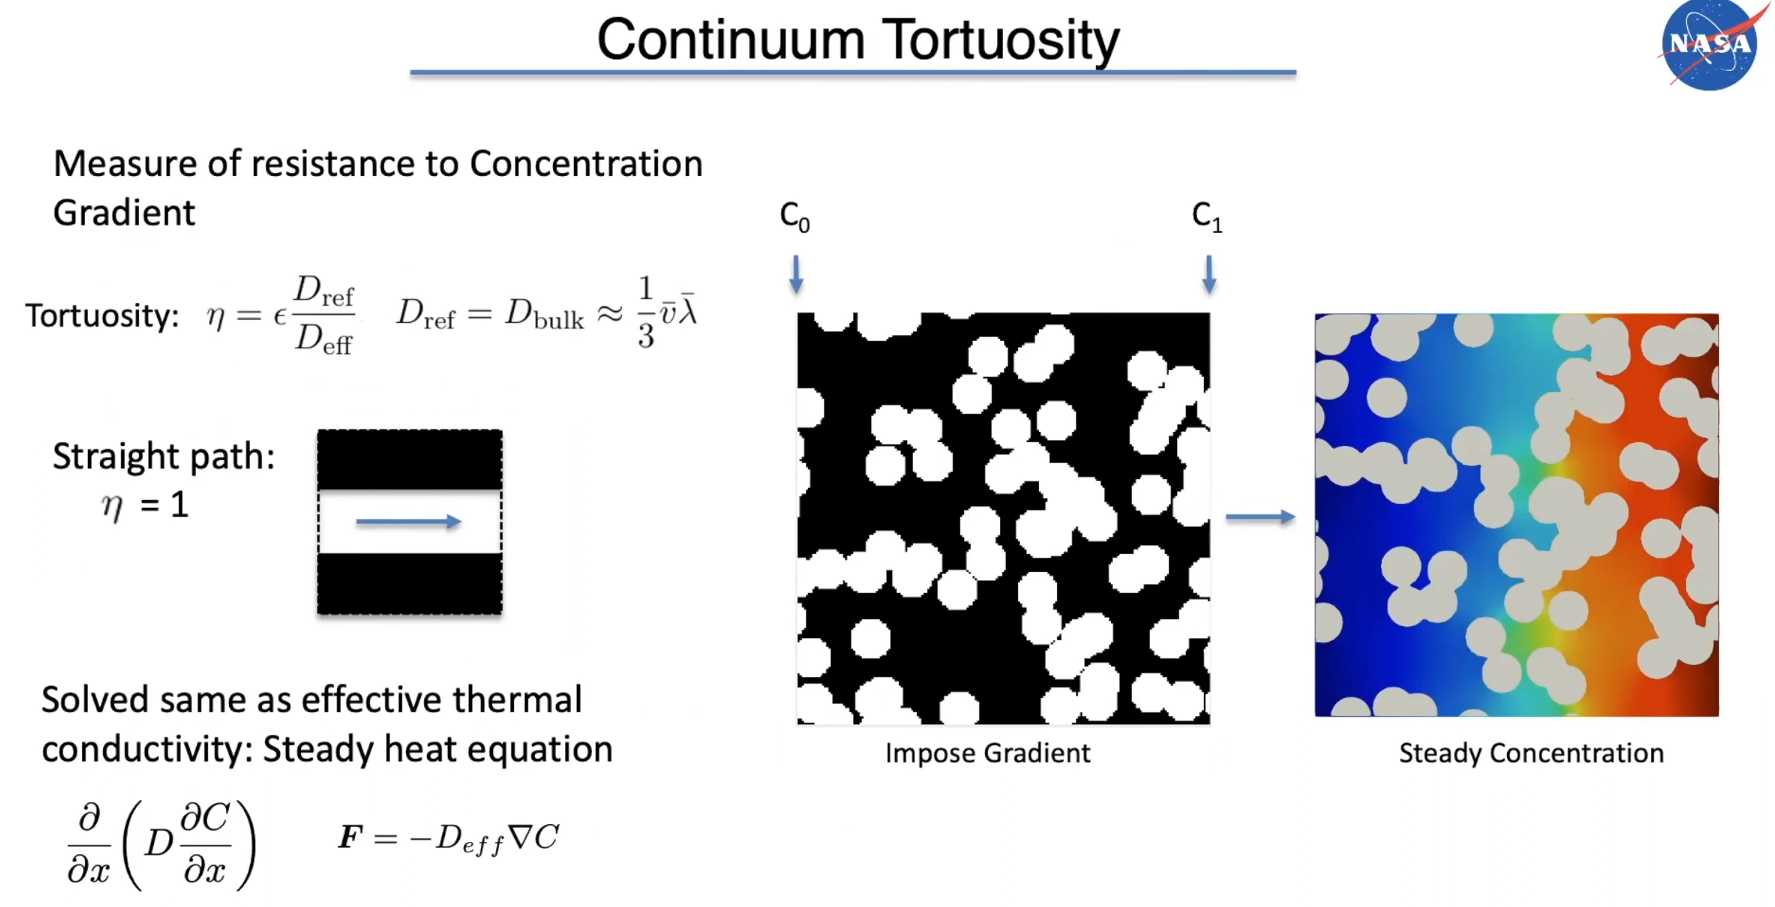
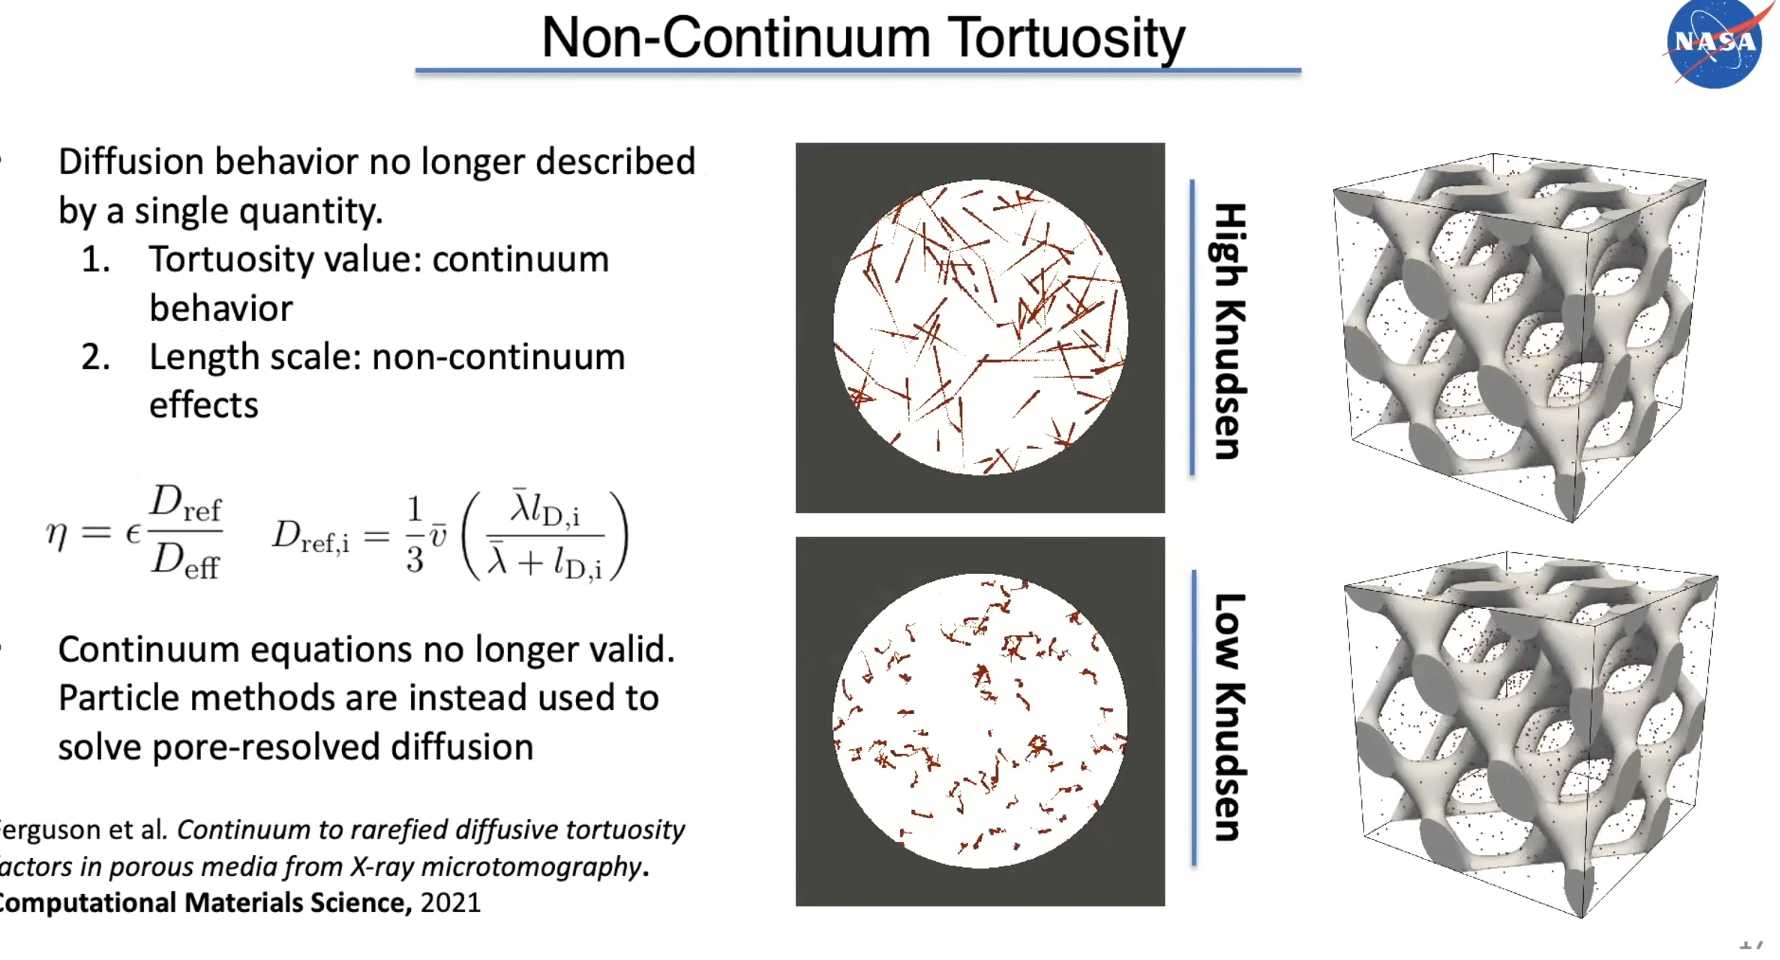
Continuum Tortuosity
Non-Continuum Tortuosity
This is for small length scale.
Software operation
视频第23分钟开始:
Session 8 PuMA Workshop 2021 - pumapy: Introduction and Setup
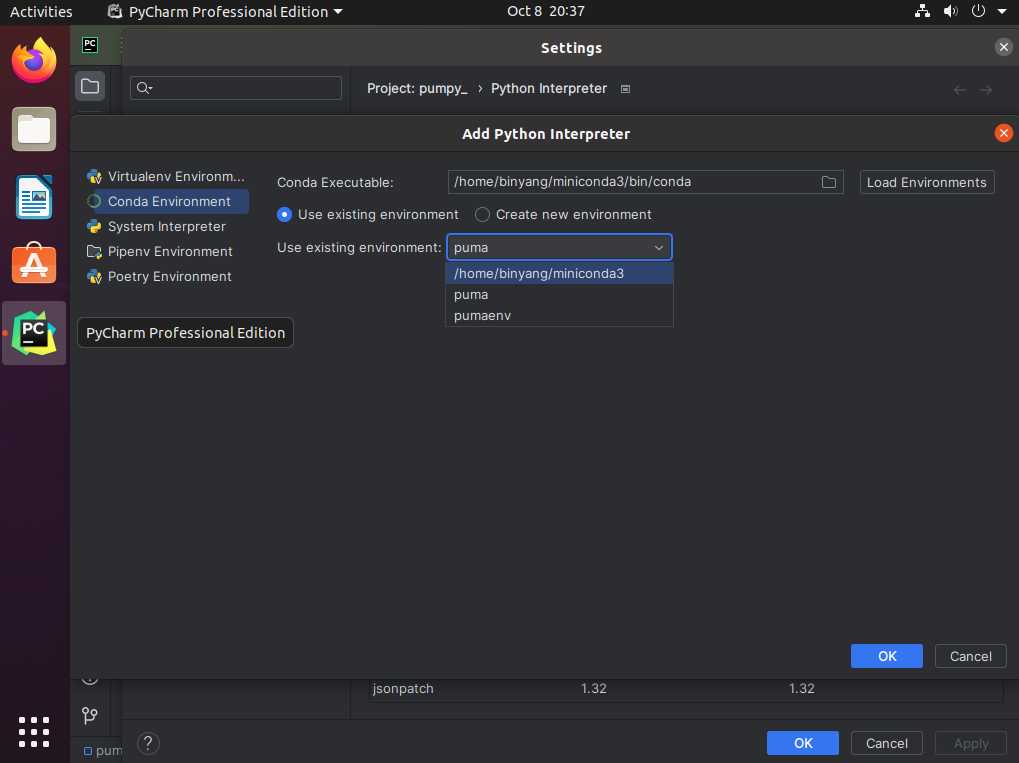
windows下pip 安装尝试不成功,最终还是使用了conda
conda activate puma
conda create -y --name puma -c conda-forge puma
然后在PyCharm中选择conda,环境选择puma。
使用pyvista在numpy和vtk数据类型转换是可能会报错,因为numpy已经废弃了numpy.bool类型,需要在PyVista中注释掉该行。
Comments NOTHING